
New in v25.4:
Transaction diagnostics allow operators and support engineers to investigate issues involving transactions in user workloads. Use the built-in function crdb_internal.request_transaction_bundle to request a transaction diagnostics bundle for a specified transaction fingerprint ID.
Requesting a transaction diagnostics bundle introduces performance overhead. This feature is primarily intended for use under the guidance of Cockroach Labs Support.
Required privileges
To use this function on a secure cluster, you must be an admin user or a SQL user with the VIEWACTIVITY or VIEWACTIVITYREDACTED system privilege. If the user has only VIEWACTIVITYREDACTED, they can request only redacted bundles.
Function signature
crdb_internal.request_transaction_bundle(
  transaction_fingerprint_id: string,
  sampling_probability: float,
  min_execution_latency: interval,
  expires_after: interval,
  redacted: bool
) -> (request_id: int, created: bool)
Parameters
transaction_fingerprint_id: A hex-encoded ID of the transaction fingerprint to capture. The fingerprint ID must exist incrdb_internal.transaction_statistics, which is the system of record for transaction fingerprints.sampling_probability: A probability value (between 0 and 1) for sampling whether a transaction bundle should be recorded. If 0 is provided, there is no sampling; the next execution of the transaction will be captured.min_execution_latency: The minimum execution time required for the transaction to be considered. Ifsampling_probabilityis non-zero, this value must also be non-zero.expires_after: The duration for which the request remains active. A value of 0 keeps the request open until fulfilled or canceled.redacted: Specifies whether the resulting bundle should be redacted.
Return values
request_id: The ID of the generated request, orNULLif the request could not be created.created: Returnstrueif the request is successfully created, orfalseif the specified fingerprint ID does not exist.
Troubleshooting example
To troubleshoot with a transaction diagnostics bundle, follow these steps:
- Identify the transaction fingerprint ID to generate a bundle for.
- Create a bundle request for that fingerprint ID.
- Download the bundle from DB Console.
- Inspect the bundle.
Setup
For this example, set the application_name to enable filtering:
SET application_name = 'cockroachdb_test';
Run the following explicit transaction, which sleeps for 10 seconds:
BEGIN; SELECT pg_sleep(10), 'cockroachdb_test' ; COMMIT;
Step 1. Identify the transaction fingerprint ID
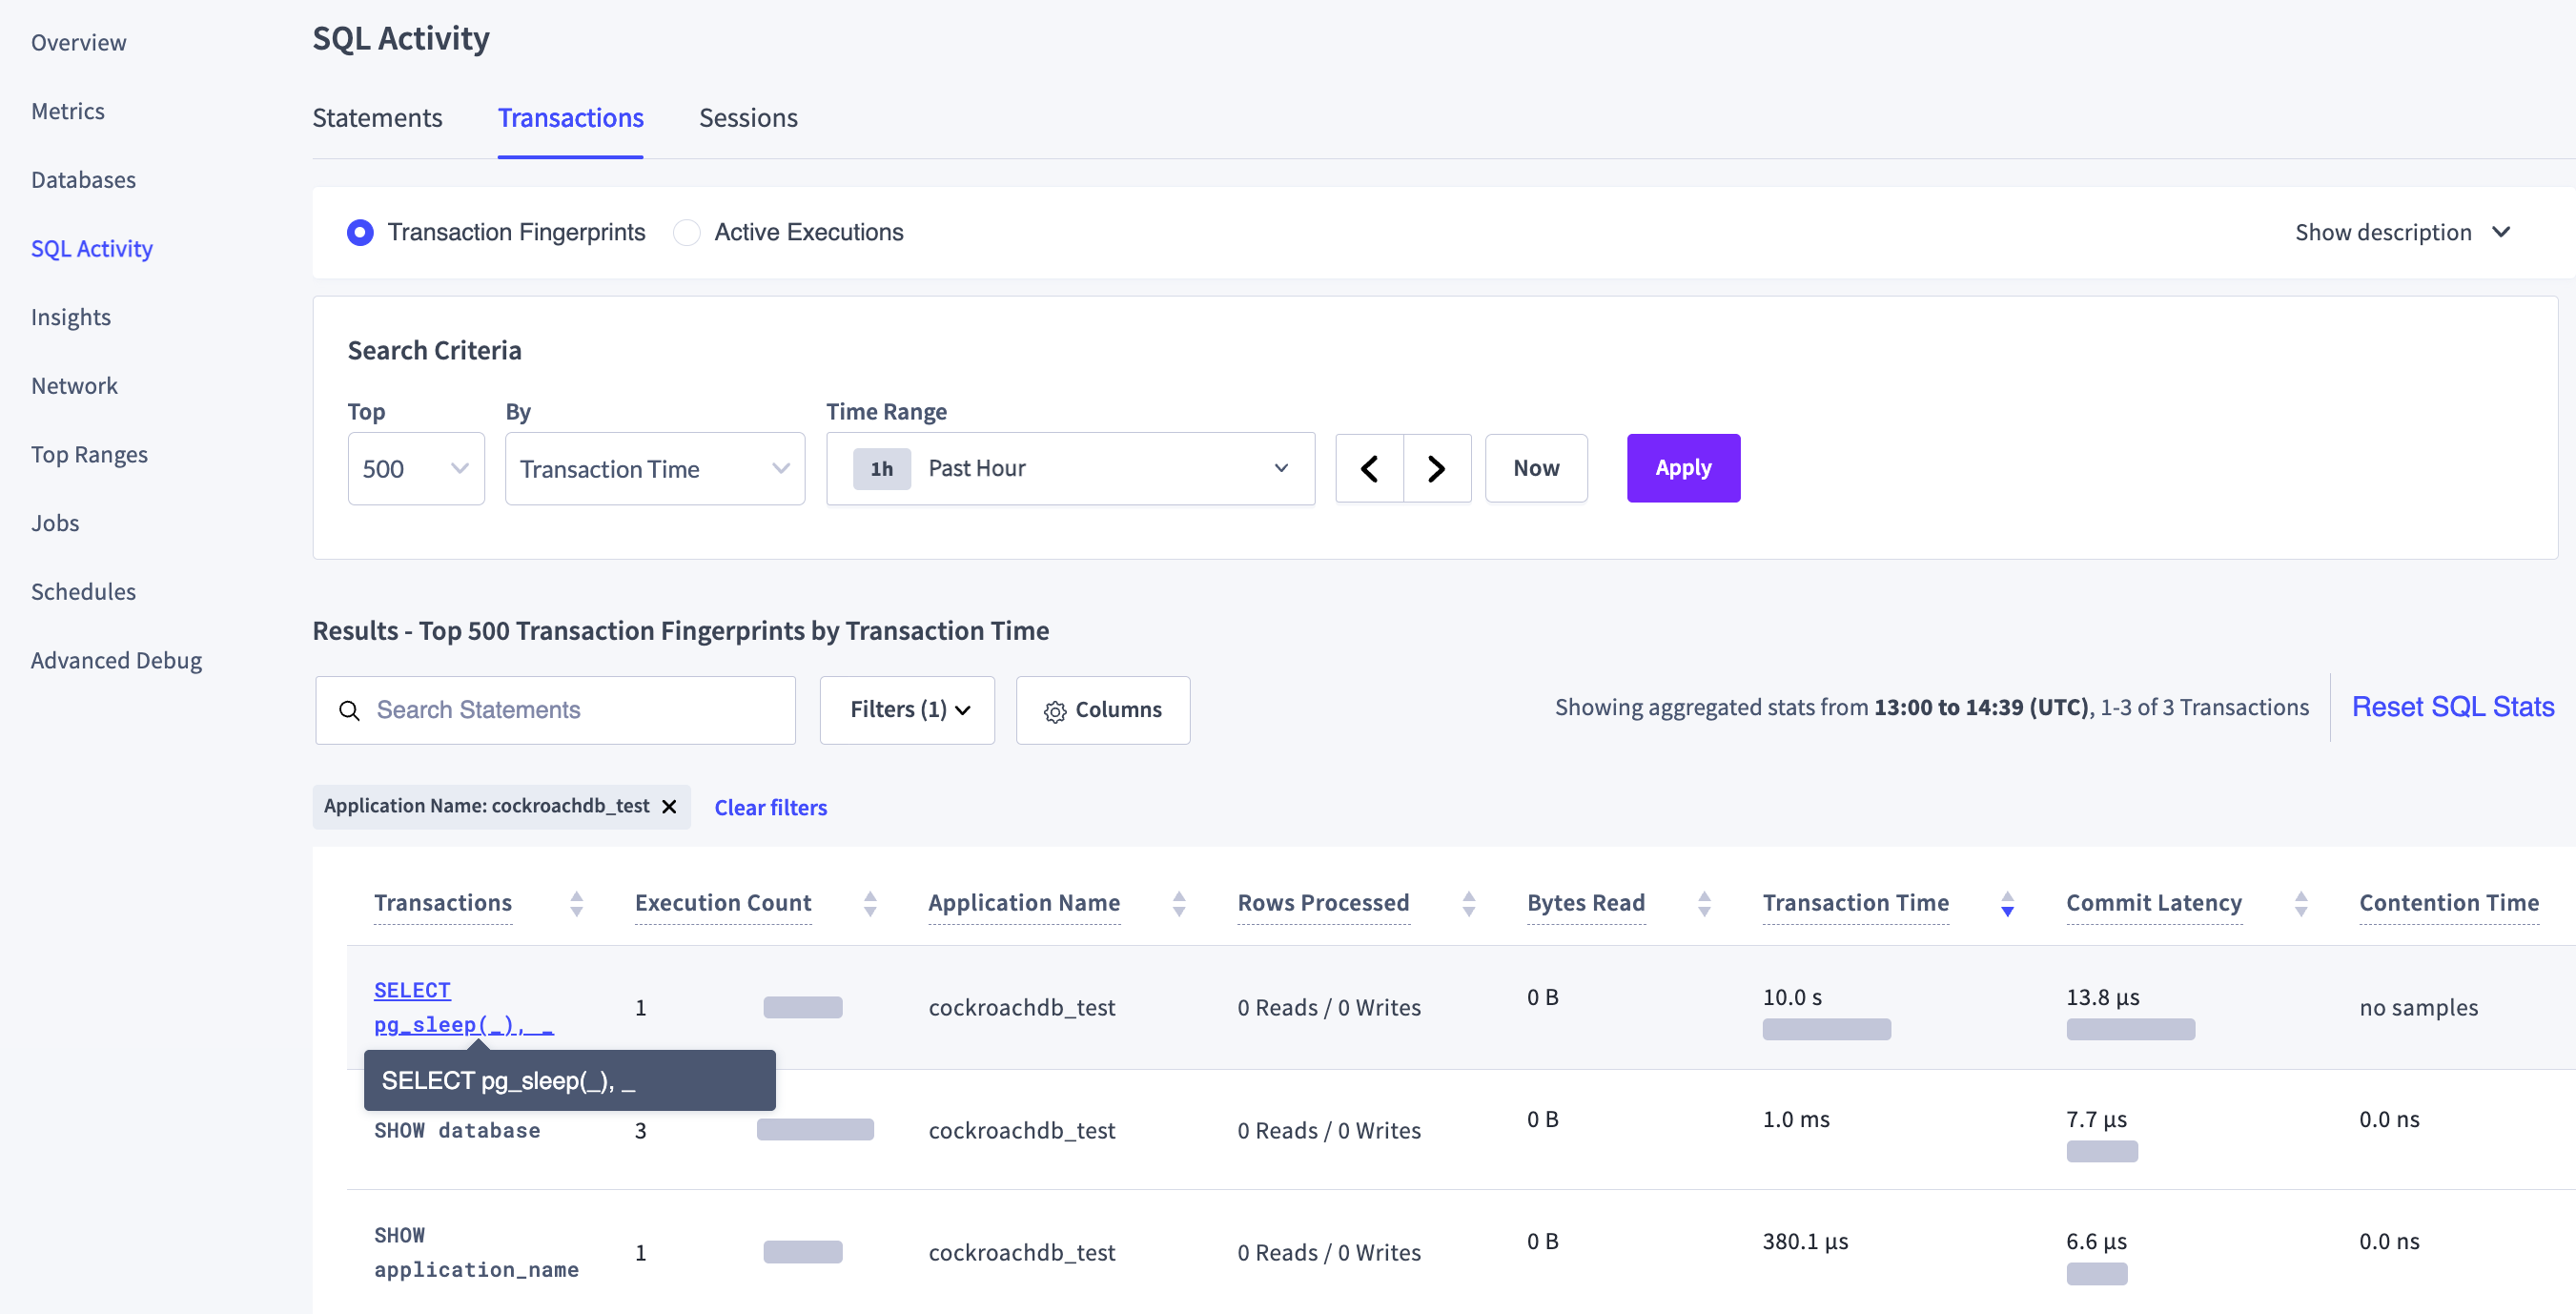
Identify the transaction fingerprint ID of the example transaction by navigating to the SQL Activity page in the DB Console. On the Transactions tab, search the Top 500 by Transaction Time in the Past Hour and click Apply to list transactions. Filter the transactions by Application Name: cockroachdb_test.
In the Transactions column, click the transaction fingerprint SELECT pg_sleep(_), _ to open the Transaction Details page for that fingerprint.
From the Transaction Details page, copy the hexadecimal Fingerprint ID for this transaction, afdd4059a899442e.
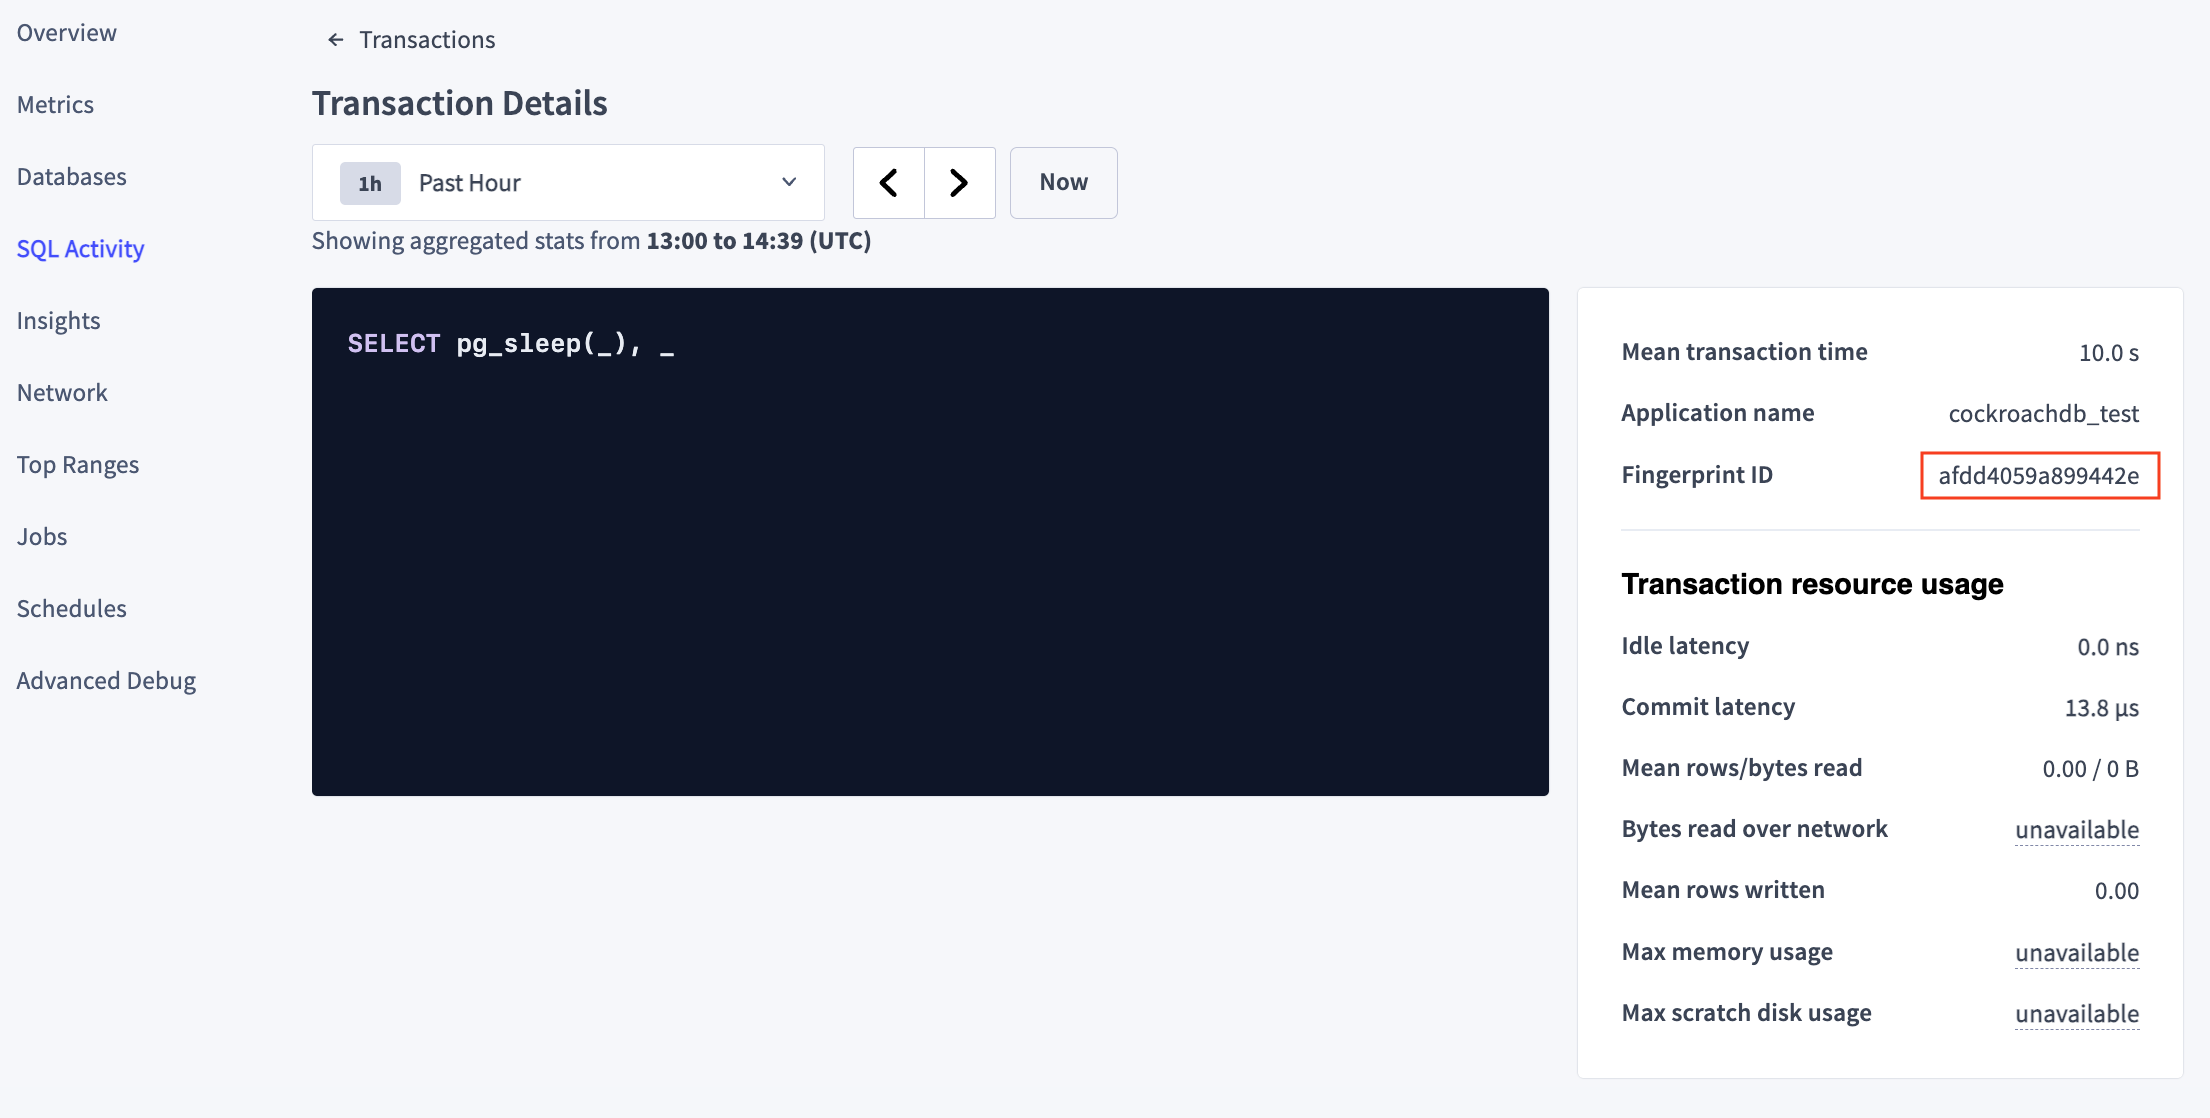
Note the decimal equivalent of the fingerprint ID in the browser's address bar. In this case, the URL may look like https://127.0.0.1:29001/#/transaction/12672355680315327534?appNames=cockroachdb_test. The decimal value of the fingerprint is 12672355680315327534.
Step 2. Create a bundle request
Create a transaction diagnostics request to be fulfilled the next time the relevant transaction is executed:
SELECT * FROM crdb_internal.request_transaction_bundle('afdd4059a899442e', 0, '0', '0', false);
The parameters to the call to crdb_internal.request_transaction_bundle() are:
transaction_fingerprint_id:'afdd4059a899442e', the hexadecimal fingerprint ID from Step 1.sampling_probability:0, which disables sampling.min_execution_latency:'0', which sets no minimum execution time.expires_after:'0', which keeps the request open until fulfilled or canceled.redacted:false, which does not redact the bundle.
Calling the function will return a request_id and a created boolean flag. This will create an entry in the system.transaction_diagnostics_request table.
> SELECT * FROM crdb_internal.request_transaction_bundle('afdd4059a899442e', 0, '0', '0', false);
      request_id      | created
----------------------+----------
  1113728276333035521 |    t

> SELECT * FROM system.transaction_diagnostics_requests;
          id          | completed | transaction_fingerprint_id | statement_fingerprint_ids | transaction_diagnostics_id |         requested_at          | min_execution_latency |       expires_at       | sampling_probability | redacted | username
----------------------+-----------+----------------------------+---------------------------+----------------------------+-------------------------------+-----------------------+------------------------+----------------------+----------+------------
  1113386248552742913 |     t     | \xafdd4059a899442e         | {"\\x00befd152e98f3f1"}   |        1113386693458034689 | 2025-10-07 14:42:18.234632+00 | NULL                  | NULL                   |                 NULL |    f     | roachprod
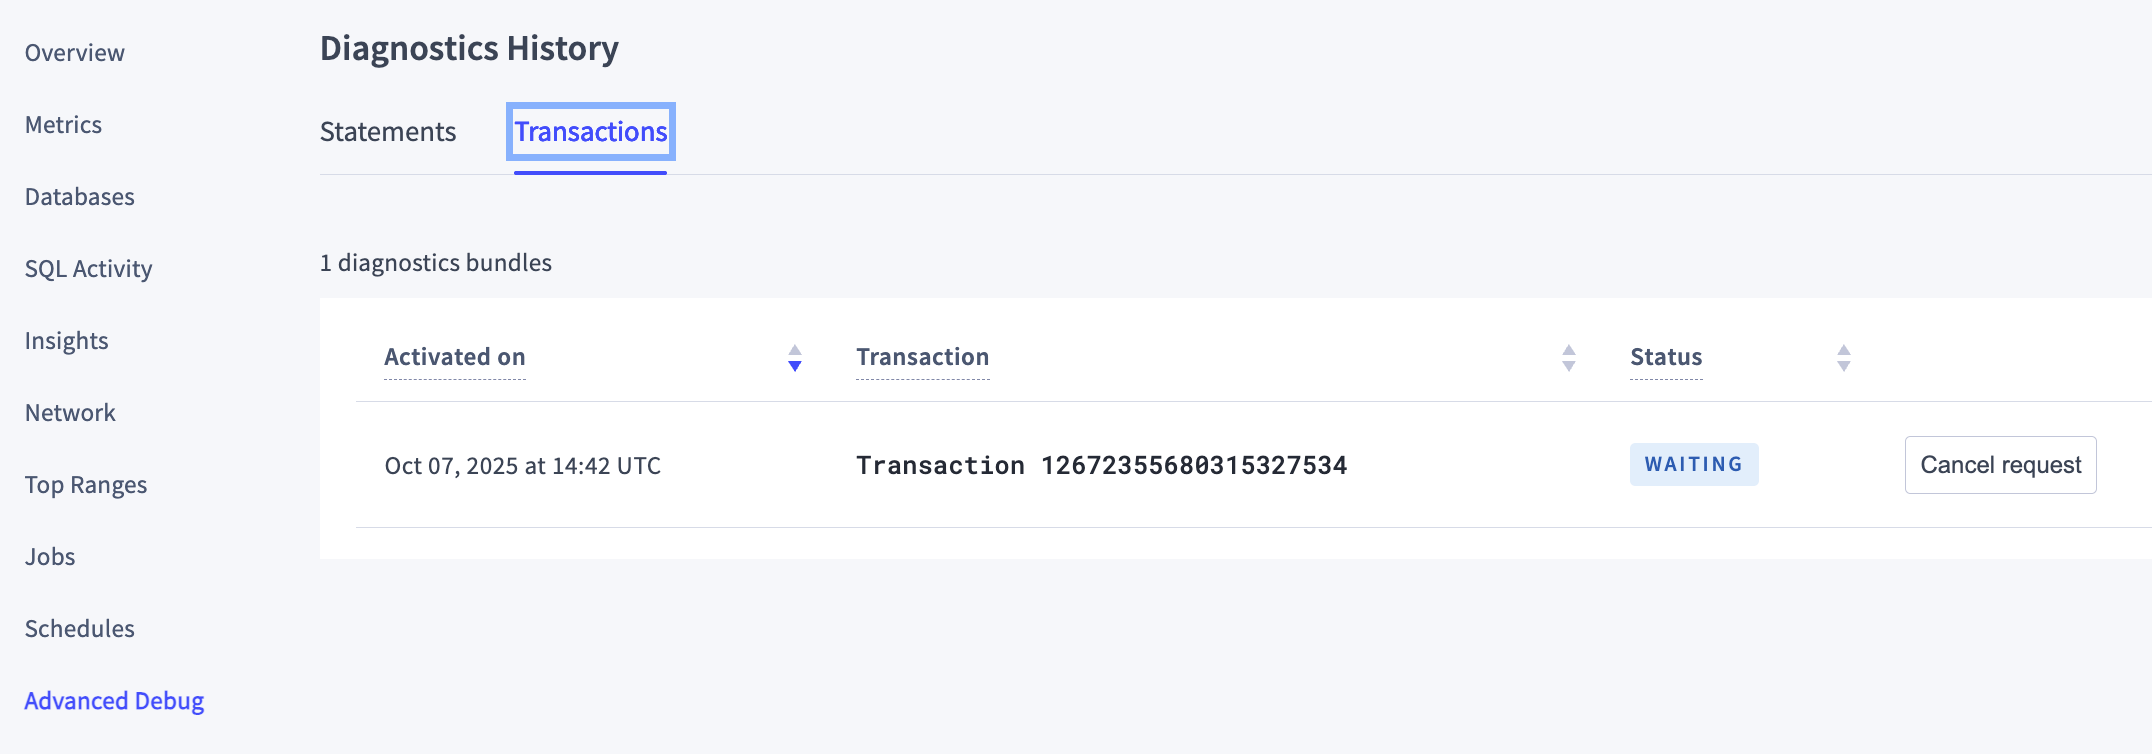
In the DB Console, go to Advanced Debug > Diagnostics History. Under the Transactions tab, there will be a row for the bundle request. You could also use the URL https://{host}:{port}/#/reports/diagnosticshistory?tab=Transactions. The page initially displays the following information:
- The date and time the request was Activated on.
Transaction 12672355680315327534(the decimal form of the transaction fingerprint ID from Step 1).- A Status of
WAITING. - A button to Cancel request (Use this if a transaction diagnostics bundle is no longer needed).
Step 3. Download the bundle
To fulfill the request, run the explicit transaction again. Note that the constant values in the transaction do not have to exactly match the original run. In the second execution of the transaction, the number of seconds differs from the original 10 and the string differs from the original 'cockroachdb_test'.
BEGIN; SELECT pg_sleep(12), 'cockroachdb_test_2' ; COMMIT;
Navigate to the Advanced Debug > Diagnostics History page in the DB Console. Under the Transactions tab, the row for the bundle request now shows:
- The date and time the request was Activated on.
- The statements for the transaction fingerprint.
- A Status of
READY. - A Bundle.zip link.
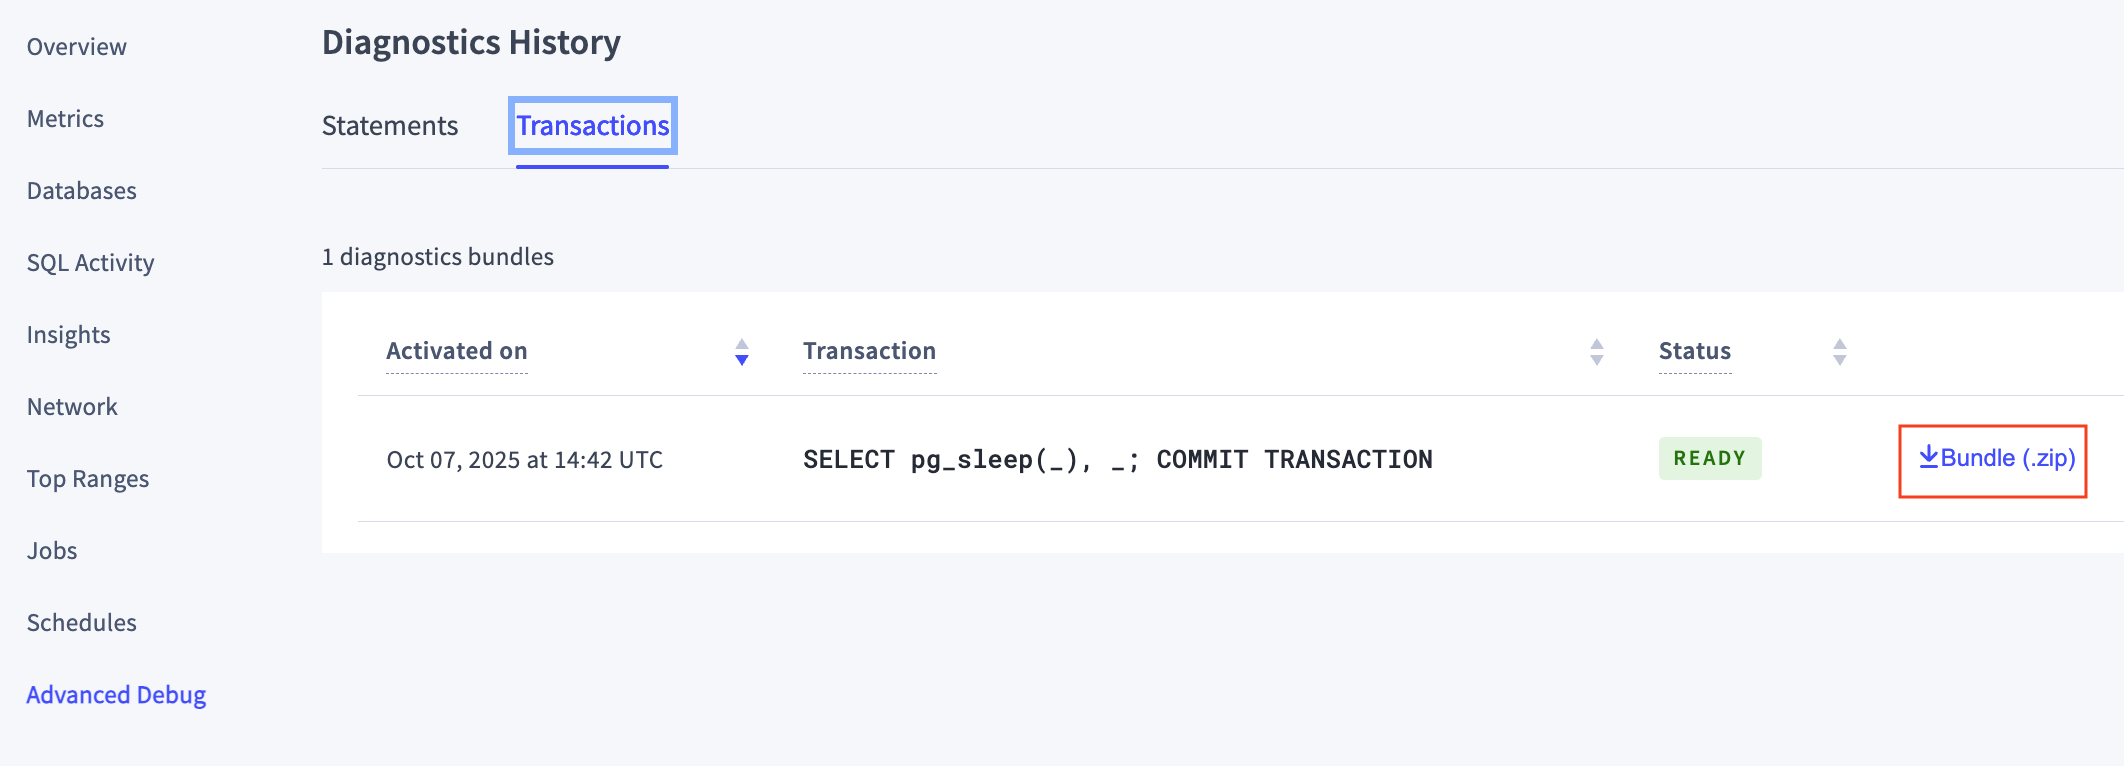
Click the Bundle.zip link to download the completed bundle, which will be named txn-bundle-1113386693458034689.zip using the transaction_diagnostics_id from the system.transaction_diagnostics_requests table.
Step 4. Inspect the bundle
Unzip the transaction diagnostic bundle and examine its contents. It contains statement diagnostic bundle zip files for each statement as well as a zip file of the transaction traces:
1-SELECT.zip
2-COMMIT.zip
transaction-1113386693458034689.zip
Unzip the zip file transaction-1113386693458034689.zip. It consists of transaction traces in various formats (including a JSON file that can be imported to Jaeger):
trace-jaeger.json
trace.json
trace.txt
